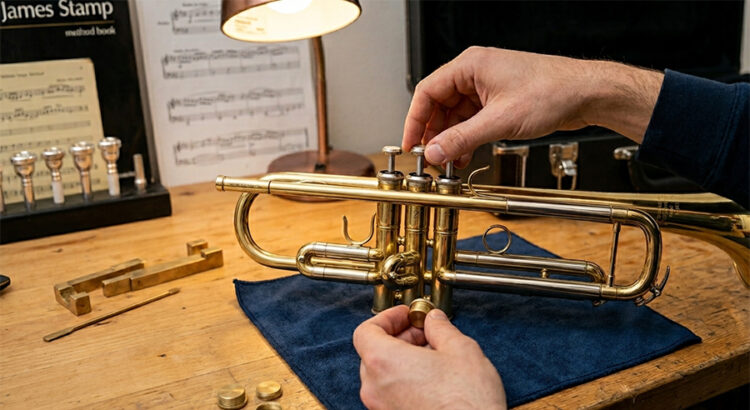
How a Simple Adjustment of Threaded Components Changes the Sound
Brass Setup and Calibration
How often do you notice two trumpets of the exact same make and model sounding completely different? Or that, after washing and reassembling a brass instrument, it suddenly feels freer or, on the contrary, harder to play with altered intonation?
The answer might lie in a detail that is as microscopic as it is revolutionary. Indeed, it is a procedure very similar to a wheel alignment at the mechanic’s. It serves to keep a car running straight, but in this case, it is applied to the trumpet.
My name is Matteo De Angelis, and I have been a trumpet teacher for over 25 years. I do not have a career as an internationally renowned soloist or principal trumpet in a symphony orchestra. However, a quarter-century of teaching has taught me a lot. Consequently, I can recognize exactly when an instrument responds well. Likewise, I notice when it fights the player. In early 2026, almost by intuition and through various experiments, I discovered an incredibly simple calibration procedure with surprising results.
I do not claim to have reinvented the wheel. Perhaps someone else in the world has had the same intuition. However, finding no trace of this technique on the Internet, I decided to put it down in writing for my students and the trumpet community.
A Matter of Physics (and Air Resistance)
There is an almost mystical view about brass instruments. Many believe an instrument only sounds good if the player is good. Of course, practice and artistry make all the difference, but equipment matters a lot! A Formula 1 driver remains world-class even driving a regular hatchback. However, they need a perfectly tuned race car to win a Grand Prix. Similarly, the same applies to skiing or tennis. Champions do not just use any gear. Instead, they rely on equipment fine-tuned by expert technicians.
The calibration I am talking about does not alter the nature of the instrument. Instead, it drastically reduces air resistance. These are micro-variations that a professional senses immediately. Furthermore, the benefits are completely clear even to a student.
With this adjustment, the instrument suddenly becomes much “easier” to play. The center of the sound (pitch) becomes so crisp and stable that the instrument “locks into” every note on its own at its maximum resonance point. As a result, the player no longer has to make constant micro-adjustments with their lips to fix intonation. The tone instantly becomes warmer and richer in overtones. In addition, traditionally flat notes (like E, Eb, and D) finally center straight. Even pedal tones pop out with extreme ease, and C trumpets acquire surprising stability.
As a matter of fact, I have personally tested this calibration on instruments I play and own (Bb and C trumpets, Bb cornets, Bb tenor horn, Eb alto horn, and Bb/A piccolo trumpet). Indeed, I experienced a true “rebirth” even in budget-friendly instruments. Therefore, I do not rule out that the scope could be wider. In fact, the same calibration could bring great benefits to other brass instruments as well.
The Mystery of the 1,296 Combinations (and Beyond)
The secret is hidden in the threaded, removable parts of the valves (this procedure only applies to piston valve instruments, not rotary ones). At the factory, these parts are mass-produced. Furthermore, they are screwed on randomly because they are considered identical. In reality, however, each piece has minute variations in mass and consistency.
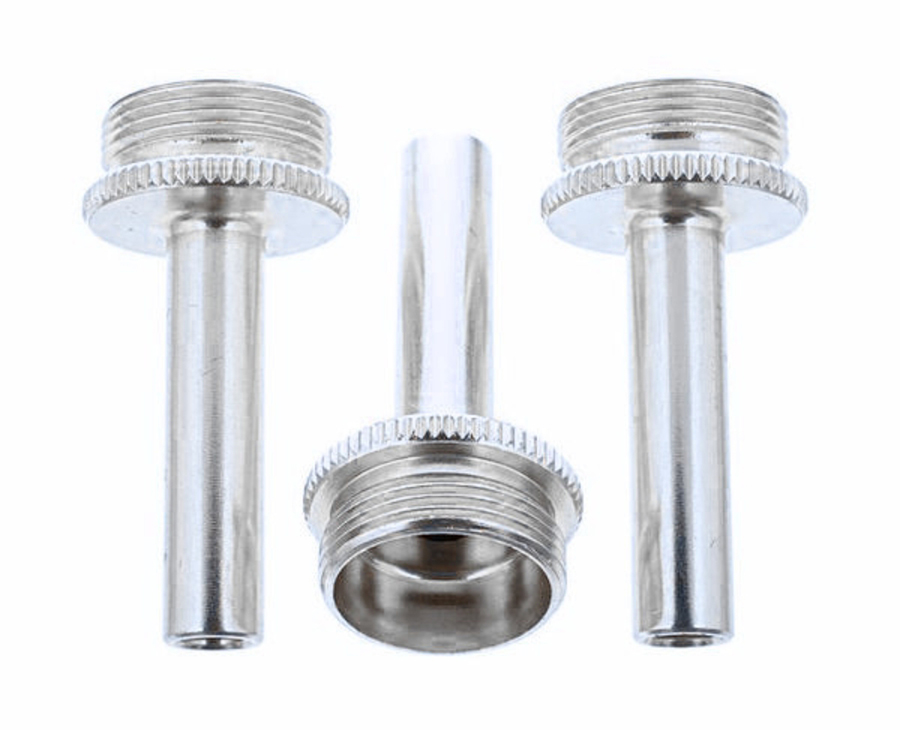
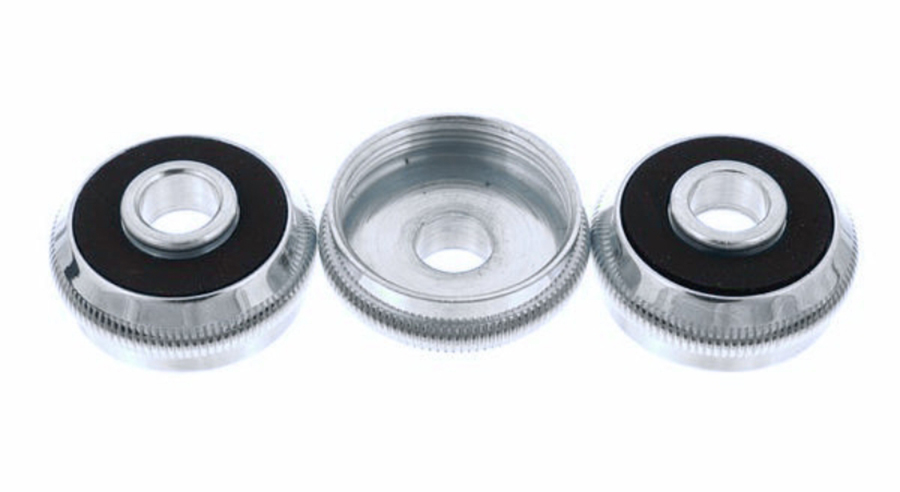
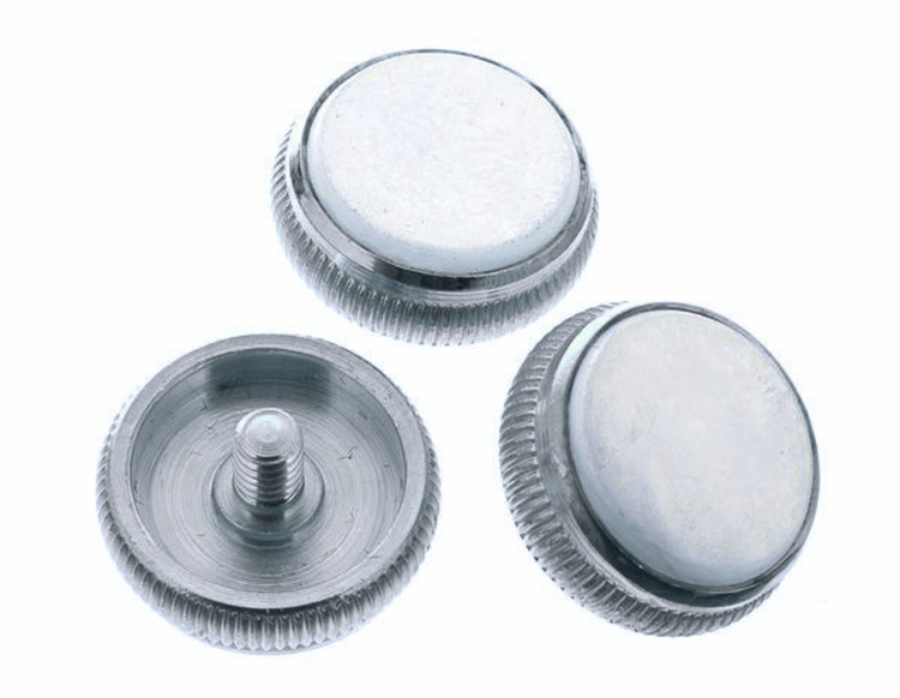
There are four components involved:
|
 |
|
 |
|
 |
|
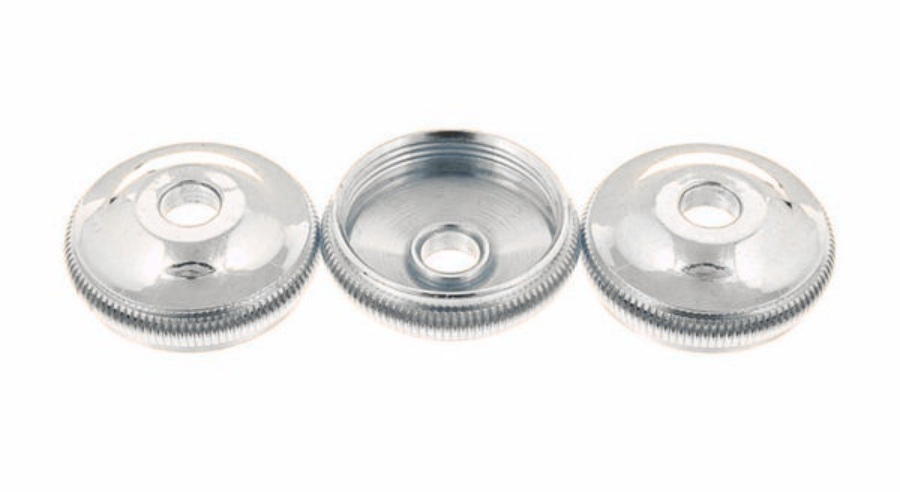 |
Here is where statistics come into play. Swapping each element among the three valves of a standard trumpet yields 6 possible combinations. Therefore, if we calculate the cross-combinations of all four groups of parts, we reach an incredible total of 1,296 total combinations!
It gets even wilder with 4-valve instruments like the piccolo trumpet or certain euphoniums. In this case, the possible combinations for each single group skyrocket to 24. Consequently, this brings the geometric total to an astronomical 331,776 overall combinations.
Finding the single perfect combination in this sea of possibilities is the core of my method.
How the Calibration Works (and Custom Setup Tools)
The process requires patience and targeted acoustic testing. First, a fundamental prerequisite is that the trumpet and mouthpieces are thoroughly washed and cleaned inside (online guides explain how to do this). Otherwise, grime and buildup risk falsifying the entire calibration. To begin, I completely disassemble all the listed parts. Afterwards, I reassemble them gradually, one group at a time, systematically testing the combinations:
-
First, the 3 Valve Stems (until finding the acoustically perfect combination).
-
Then, the 3 Top Valve Caps.
-
Next, the 3 Finger Buttons.
-
And finally, the 3 Bottom Valve Caps.
Doing this job properly is not immediate. In fact, to carry out these adjustments with total precision, I had to design and build dedicated custom tools. Without them, calibration would be impossible. For instance, consider one practical detail. If you remove the top valve caps during tests, internal springs push the pistons too far up. For this reason, they must be held in position using specific supports during acoustic tests.
Furthermore, complexity varies from instrument to instrument. On certain Yamaha trumpets, for example, there is a stop screw for the third valve slide that can be placed in two different points. During calibration, I must run additional tests considering both positions. Consequently, this detail increases the number of combinations to check to find the ideal setup.
(Rarely, in extreme cases on some models, it is even necessary to evaluate reversing the U-shaped second valve slide).
A Paradigm Shift: You Need More Air!
It is important to clarify this point: this calibration does not alter the trumpet invasively, nor does it turn it into a completely different instrument, because it simply reorders existing threaded components. However, by reducing micro-resistances, it makes the instrument noticeably freer and more open.
Consequently, this creates a paradox: without the familiar “wall” of air resistance (the backpressure), you can actually tire yourself out faster if you do not know how to manage it.
Many trumpet players use the instrument’s mechanical resistance as a physical brace. When the trumpet clears up, missing that pushback on their lips, they make the mistake of blowing too hard (over-blowing) in an attempt to recreate the familiar physical sensation. The result? They run out of air instantly and fatigue their lip muscles prematurely.
Furthermore, as the great James Stamp used to teach, this adjustment assumes that the musician is used to playing “straight”, maintaining the exact same embouchure across all registers.
Initial fatigue is therefore simply a sign that the instrument is freer. The solution is not to push against a wall that is no longer there, but to re-educate your breath support. Specifically, you need to sustain the sound with a steady airflow while avoiding compensation with your throat or lips. Once you adapt, technical exercises that previously seemed like insurmountable obstacles will become fluid and natural.
The Mouthpiece Factor
A fundamental aspect that should not be underestimated concerns mouthpieces: the new setup radically changes the airflow, which is why the mouthpiece must also be re-evaluated and tested from scratch after adjusting the instrument.
To eliminate variables and work with maximum scientific precision, I perform the calibration using my custom AR Resonance mouthpieces (which I use personally for jazz or pop due to their impeccable accuracy). On the other hand, for classical music, I rely on Yamaha or Bach.
In any case, once the perfect setup is found with these reference points, the instrument will feel much more fluid and you will be able to play easily with any other mouthpiece.
The Doubt About the “Human Factor”
At this point, many might raise a legitimate doubt: “Isn’t it possible that the instrument only sounds good because it is calibrated to the physical traits of the person doing the adjustment?” The answer is no, and indeed, it is something I have verified in the field with many students. Of course, I have a very straight way of playing – an approach I consider ideal for anyone – but the benefits of the calibration were immediate and noticeable for everyone, regardless of individual setup.
Who Is This Calibration For? (And the Guarantee of Reversibility)
This method offers the most immediate benefits to developing students: eliminating physical resistance prevents bad embouchure habits from forming and makes the learning process much smoother.
For professionals or advanced students, however, caution is required. Those who have been playing for years have developed automatic micro-adjustments to compensate for their instrument’s flaws. A suddenly “free” trumpet not only requires more air, but also changes previous intonation reference points: it requires a readaptation period that those with an intense concert schedule often cannot afford in the short term.
For this reason, the procedure is completely reversible: before starting, I mark the original positions of all threaded components (e.g., 1-2-3). I then provide a sheet with the new optimized setup (e.g., 2-3-1). In this way, the player is free to test the new alignment knowing they can revert to the original setup at any time.
Surprises in the Upper Register: When Calibration Exposes Factory Defects
A trumpet finally free from resistance allows you to gain quite a lot in terms of ease and projection in the upper register. Precisely because of this, however, mouthpiece behavior becomes crucial. For instance, it often happens that two mouthpieces, seemingly identical in brand and model, respond in opposite ways in the extreme high register. It is as if the sound suddenly chokes with one of them instead of opening up.
Unfortunately, millimeter alignment exposes every single acoustic detail. As a result, musicians might discover that a mass-produced mouthpiece has small factory defects that remained invisible until that moment, making it impossible to use once trumpet resistance is eliminated. This issue does not occur with custom mouthpieces, which benefit from much stricter quality control.
If this should happen with a stock mouthpiece, the solution is unfortunately to buy a new, identical one, making sure to test it in person on the calibrated trumpet before purchasing it. For this reason, the calibration session I offer always includes testing the mouthpieces you regularly use, which you can provide along with the instrument to find the definitive setup.
Want to Try It on Your Instrument?
Currently, I perform this adjustment primarily on Bach and Yamaha Bb and C trumpets (upon request, I can also evaluate other brands, as well as piccolo trumpets, flugelhorns, or euphoniums, although the procedure on the latter is much more complex).
If you are curious to discover the true potential of your instrument and want to eliminate hidden resistances holding back your practice or performance, feel free to contact me privately. Together, we will find the best solution to breathe new life into your instrument.
You can write to me directly at: info@matteodeangelis.org
P.S.I deeply believe in the value of this discovery. Since it originated in Italy, I wanted to make sure to publish this article in English as well to eliminate any language barriers, encouraging sharing and discussion with fellow musicians globally. Therefore, everyone is free to experiment and draw their own conclusions!